Introduction: Why Drywall Repair Matters
Let’s face it—drywall damage happens. Whether it’s from a rowdy game of indoor catch, an accidental bump moving furniture, or just the wear and tear of daily life, at some point, you’re going to need to know how to repair drywall. And no, it’s not as intimidating as it seems.
You don’t need to call in a pro every time your wall gets dinged. A lot of common drywall issues can be resolved with just a few tools, a bit of time, and a willingness to get your hands a little dusty. In this guide, we’re diving deep into everything you need to know to repair drywall—from tiny nail holes to larger patches. how to repair drywall
What makes this article different? It’s written by someone who’s been in the trenches—literally pulling out crumbled drywall, smoothing down compound, and getting that seamless finish. Whether you’re a total newbie or you’ve done a patch or two before, you’re going to find tips and tricks here that make the job easier and your results cleaner. how to repair drywall
Tools and Materials You’ll Need
Before you even think about diving into a drywall repair job, make sure you’ve got the right tools and materials. Trust me, having the right gear on hand can be the difference between a patch job that looks professional and one that screams DIY disaster. how to repair drywall
Here’s a breakdown of what you’ll typically need:
Utility knife—for cutting drywall cleanly.
Drywall saw—Helpful for larger holes or cutting out damaged sections.
Putty knife or taping knife—you’ll use this to apply joint compound.
Joint compound (aka mud)—This is the magic stuff that makes everything smooth.
Drywall tape—mesh or paper—helps prevent cracks in your repair.
Sandpaper or sanding sponge—for smoothing things down between coats.
Drywall patch or spare drywall piece—depending on the size of your repair.
Screws and drill—needed if you’re replacing a drywall section.
Primer and paint—to finish things off and make it all blend in.
Once you have your supplies, organize them in a bucket or toolbox. There’s nothing worse than mid-job hunting for that one missing tool. how to repair drywall
Step-by-Step: How to Repair Small Holes in Drywall
Small holes in drywall are one of the most common types of damage. Think nail holes, screws, or small dings from door handles. Good news? These are super easy to fix and usually don’t take long at all. how to repair drywall
Step 1: Clean the Area
Start by cleaning the area around the hole. Wipe off any dust or grime. If there are rough edges or loose drywall bits, trim those away with your utility knife. You want a clean, solid surface for the joint compound to stick to. how to repair drywall
Step 2: Apply Spackle or Joint Compound
Use a putty knife to apply a small amount of joint compound over the hole. If the hole is tiny (like from a nail), one swipe may be enough. For slightly larger holes (up to the size of a quarter), apply the compound in layers. how to repair drywall
Smooth it out so it’s slightly raised above the wall’s surface. Don’t worry about perfection here—you’ll sand it down later. how to repair drywall
Step 3: Let It Dry, Then Sand
Drying time varies based on the compound and your room’s humidity, but give it at least a few hours (overnight is even better). Once it’s fully dry, use sandpaper or a sanding sponge to smooth it down until it’s flush with the wall. how to repair drywall
Step 4: Prime and Paint
Once it’s sanded smooth, apply a little primer (especially if you’re working on a painted wall). Let that dry, then paint to match your existing wall color. Done! It’s like the hole was never there. how to repair drywall
Medium-Size Holes: The Patch Method
When you’re dealing with holes bigger than a coin but smaller than your hand, a simple compound won’t cut it. You need to patch it. But don’t stress—it’s still totally doable without professional help. how to repair drywall
Step 1: Trim and Clean the Hole
Start by using a utility knife or drywall saw to square off the hole. You want clean, even edges, not ragged ones. This makes the patch sit better and blend in more easily. how to repair drywall
Then, clean around the hole. Remove dust, loose drywall, or old paint chips.
Step 2: Cut and Fit the Patch
If you have a pre-made patch, great—just make sure it fits snugly. If you’re cutting your own, measure the hole and cut a piece of drywall about 1/8″ smaller on all sides. You’ll also need to cut a piece of wood (like a paint stick or scrap furring strip) to act as a brace inside the wall. how to repair drywall
Screw the brace into place behind the hole, then screw the drywall patch onto the brace. how to repair drywall
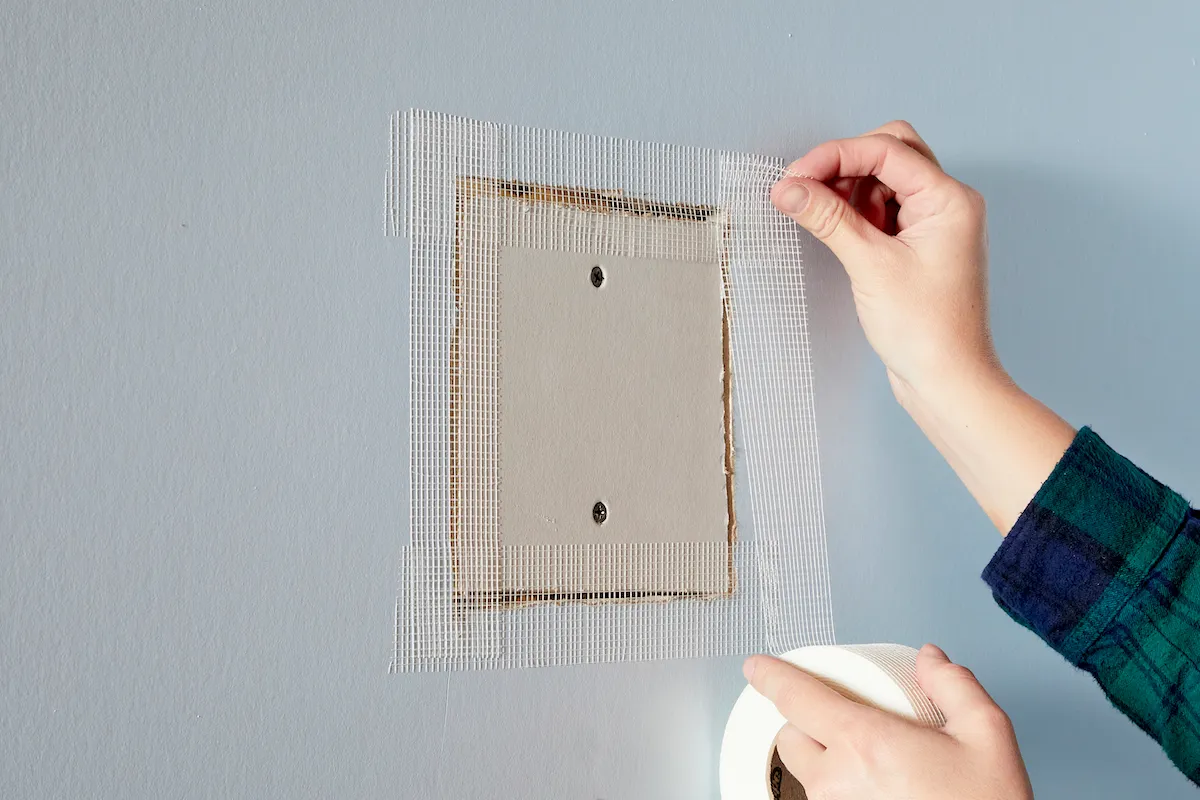
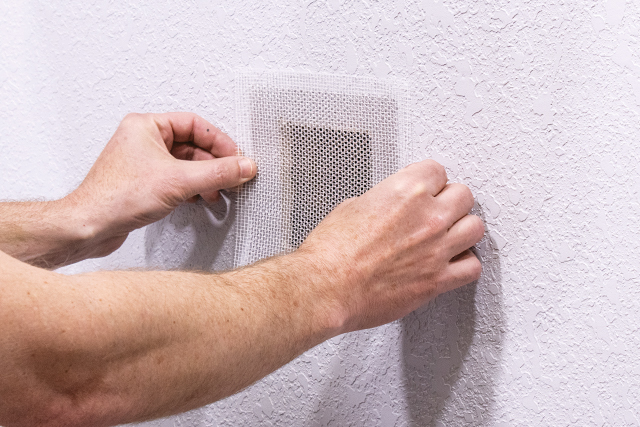
Step 3: Tape and Mud
Cover the seams with drywall tape. Then, apply a generous layer of joint compound using a wide taping knife. Feather the edges to blend it into the surrounding wall. how to repair drywall
Let the compound dry completely, sand it smooth, then repeat with a second (and maybe third) coat for the best finish. how to repair drywall
Step 4: Prime and Paint
Once your patched area is smooth and flush, prime it and then paint. It’s a bit more effort than a small hole, but still very doable. And the finished result? Practically invisible. how to repair drywall